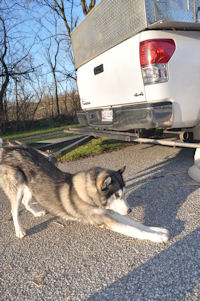
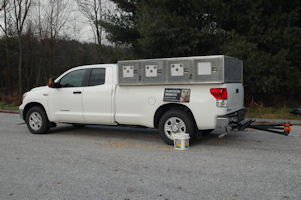
We transport our dogs in boxes on our dog truck (a
Toyota Tundra). Transporting the rigs and sleds is
another story.
We modified our three wheeled Fritz Dyck SAM rig
to allow the uprights to easily fold flat. With the
SAM, a large cotter pin is used to connect and disconnect
the steering shaft. We replaced the standard metric
allen screws and nyloc nuts attaching the upper side
supports with universal clevis pins and hairpin cotter
pins.
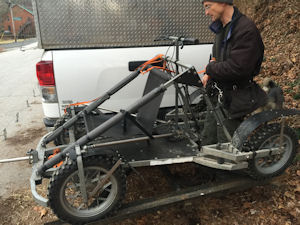
The four wheeled Fritz Dyck TOM rig is a good bit
larger than the SAM and more difficult to transport.
In particular, the TOM rig does not have a split steering
shaft and requires disconnecting multiple metric rod
ends to collapse the rig to fit in our vehicle. In
this case, it did not seem practical to change to
a quick release system.
We decided to go with a hitch mounted carrier. Most
hitch mounted cargo carriers and mobility carriers
are not large enough to carry a larger rig. VersaHauler
makes an ATV (VH90)
carrier suitable for large ATV's and rigs. VersaHauler
rates the maximum ATV weight based on the size and
configuration of the carrier vehicle. Typically, you
need a 3/4 ton truck to have the suspension capacity
required for a VersaHauler.
We decided to make our own hitch mounted carrier
based on dimensions from Sled
Dog Central.
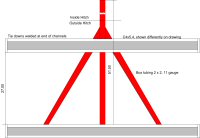
The plan drawing is shown below. Click on the image
for an enlarged version. Please note that the following
drawing has not been reviewed for structural calculations.

We used 11 gauge 2 in. x 2 in. box tubing for the
main and diagonal supports. One 20 foot length provided
sufficient material for all three components.

We used C4x4.5 for the wheel tracks. Initially, we
planned on building the channels from expanded metal
(for the floor) with an angle iron frame. The C4 channels
were a bit cheaper than the angle and expanded metal.
The TOM has a different front and rear track, which
makes the process a bit harder. The C4 channels are
basically the same width as the TOM tires. Our initial
version of the hitch carrier had the rear channel
(furthest from the vehicle) welded in place and the
front channel bolted on. Because the front and rear
tracks do not match, the front channel and rear channel
are not parallel. If we were to do it again, we would
make wider channels for both, which would allow the
channels to be parallel and make it easier to load.

Since we have both the three wheel SAM and four wheel
TOM rigs, the rear channel was welded to the frame.
The front channel can be moved to adjust between the
two rigs. A third channel is bolted to the frame for
the center wheel of the SAM rig.

After using the hitch carrier several times, we decided
to modify the design. Our initial carrier had a longer
main support (approximately 51"), which gave
the cart roughly 8" to 10" of clearance
from the rear bumper. The design also acted as a giant
lever and the weight of the rig tended to cause a
fair amount of motion at highway speeds. As a result,
we moved both channels in towards the vehicle and
cut off the excess material at the rear of the carrier.
In the process, we changed from a welded rear channel
and bolted front channel to a welded front channel
and bolted rear channel. In addition, stiffeners were
added to reduce rotation. The net result was to move
the rig in towards the center of gravity of the vehicle.
This appears to have helped to some degree.
We created tie down attachment points on each channel.
We took a scrap of box tubing and cut it into 1/4
in. long sections. The sections were welded to the
outside edges of the channel and provide secure locations
for ratchet tie downs. We found that standard ratchet
tie downs can release and replaced the tie down hooks
with clips with gates.
The rig carrier was originally built for our old truck, a 1998 Ford Expedition. Years later, the rig
carrier is still in service with an occasional coat
of fresh paint.
|